PowerShell美化
PowerShell美化
前言
不知道从什么时候开始的呢?不满一点点的累积下来,终于有一天,觉得pwsh实在是太丑!于是决定花一点时间来美化,优化一下体验。
这篇blog中会使用scoop这里默认大家已经安装,有需要的话可以看一下教程-Scoop 超好用的Windows包管理器
优化用到的Tools如下:
美化:oh-my-posh, Nerd Font, PSReadLine, catppuccin
功能性:coreutils(rm), lsd and eza
美化
1 | $PROFILE |
通过这个command获取配置文件的路径,然后对配置文件进行修改,这里可能遇到由管理员权限也无法写入的问题,我本人是将文件复制出来,修改,再覆盖的做法。理论上只需要执行一次,后续就可以直接修改。
安装包
1 | scoop install oh-my-posh |
好的,命令列表给出来之后,就是讲解各个包了
oh-my-posh
最基础的包,直接上配置文件吧
1 | oh-my-posh init pwsh --config "C:\Users\edge\scoop\apps\oh-my-posh\current\themes\peru.omp.json" | Invoke-Expression |
Invoke-Expression: 执行设置peru.omp.json: 主题名称, themes文件夹下oh-my-posh自带有很多主题,可以自行选择喜欢的
Nerd Font
配置好oh-my-posh大家会发现很坏的事情,图标什么的根本渲染不出来,所以就需要好好的配置字体啦。
Nerd Font Project是个好平台,本人选用的是CaskaydiaCove Nerd Font Mono, 大家搜素CaskaydiaCove就好,Mono是文件夹内自带的系列,Mono是等宽的意思,适合code环境使用,还有非等宽的Propo,也许适合写文章
Nerd Font Project : https://www.nerdfonts.com/font-downloads
Catppuccin
PowerShell官方的配色是接受不了一点的,不好看,而且经常因为背景图片容易看不见,这肯定是你们配色调制的不好,怎么可能是吾辈的问题,所以需要Catppuccin的大驾光临
- Clone this repository locally.
- Place the contents of the repository in a folder named Catppuccin in a folder on your PowerShell Module Path. You can find your current PowerShell Module Path by running $env:PSModulePath in PowerShell.
- Import the module by running Import-Module Catppuccin in PowerShell. You can also add this to your PowerShell profile to automatically import the module when you start PowerShell. This may be useful if you want to use Catppuccin in your prompt.
- Start using the module! Help is available by running Get-Help Catppuccin.
上面贴出了官方README文件,简单来说,通过$env:PSModulePath命令获取Modules文件夹的可能位置,选择一个喜欢的(路径可能还未创建,那你就自行建立文件夹,包括ps配置文件也可能没有创建要自己建立)
然后clone代码库,将文件夹命名为Catppuccin, 随后执行:
1 | Import-Module Catppuccin |
再之后就是编写powershell配置文件了,因为很长,所以在文章末尾贴出。
这里说一下吾辈选择的配色方案吧,就是Official README里面的Mocha啦
VSCODE字体调整
美化终端之后,VSCODE是一定要调整字体的,不然图标会出问题的嘛,在json文件添加下面两行就好
1 | "editor.fontFamily": "'CaskaydiaCove Nerd Font Mono', 'Cascadia Code', Consolas, monospace", |
fontFamily选择字体,逗号分隔,VS Code 会从左到右顺序寻找字体,让配置文件具有通用性
fontLigatures 用于字体美化
功能
安装包
1 | # ls replacement |
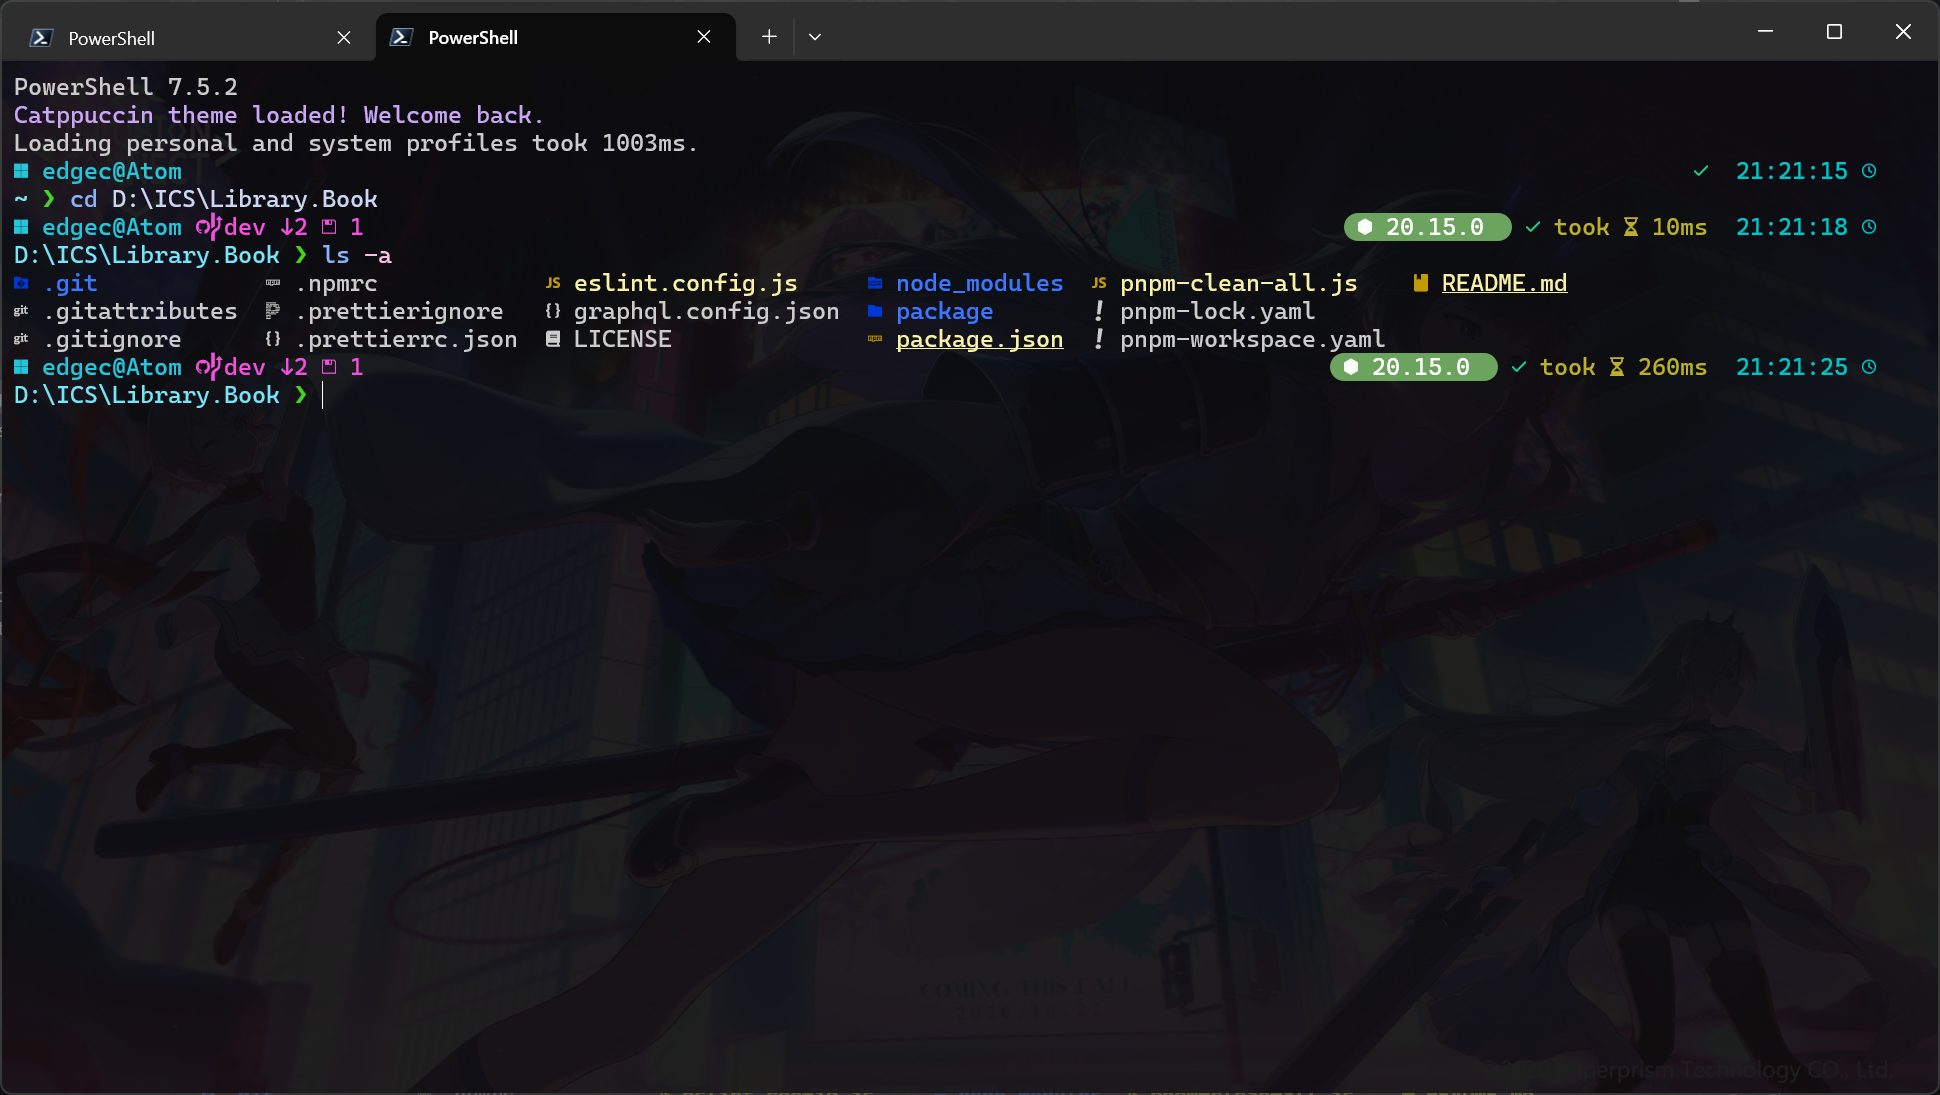
lsd and eza
正是因为使用lsd and eza替代了pwsh自带的ls,所以才可以放弃Terminal-Icons, 不过根据Catppuccin的经验,配置一下也绝非难事
总之,lsd 和 eza 都是绝佳的 ls 工具,提供了不同方面的功能,具体配置详见末尾配置文件
这里介绍一下别名机制,function ls 会定义 ls 函数,不会触发错误,但是如果不事先移除默认内建别名,是不会起作用的,这里在AI的帮助下建立了使用lsd和eza的个人认为的合适时机
简单说一下,lsd上手容易,0配置,自带图标,很方便。eza更极简,主流?功能某方面也丰富一些
经过实际体验之后,eza 配置丰富,功能性强,最后还是选择 eza 作为ls唯一替代,允许比如 dir 颜色修改,lsd 不支持
1 | $env:EZA_CONFIG_DIR = "$env:USERPROFILE\.config\eza" # 配置别名 |
rm
吾辈还引入了coreutils工具集,主要就是rm库了,这里不推荐覆盖原本的rm指令,因为这样的功能性指令会被大量的,遵循pwsh规范的使用,会引发很多问题,五倍是通过Set-Alias nrm rm.exe定义了一个新命令
配置文件
1 | # functions modify |